– Digital photography through telescopes and microscopes
1. Can I attach a digital camera to telescopes or microscopes?
2. What is the digital eyepiece/camera for telescopes and microscopes?
3. How to connect a DSLR (or digital SLR) camera to telescope for digiscoping?
4. I wish to attach my Nikon DSLR D3200 camera to the Nipon biological microscope to take pictures of samples. Could you please advise on how to do this?
5. I have got the Nipon 25-125×92 spotting scope which is very good and powerful. I also bought the T2 connector (T-adapter set) for my Sony A380 camera. But when I connect it to my camera, it says ‘No lens attached’, ‘shutter is locked’. Why is this?
6. I wish to connect my Panasonic Lumix DMC-G1 4/3 DSLR camera to the 25-125×92 scope. Which camera adapter should I use?
7. Why do I only see a white image when I try to take pictures of the full Moon using my Nipon digital eyepiece/camera?
8. My EE300 has a threaded section on the ‘eyepiece’ that allows the lenses, by rotation, to be moved closer or further away from the chip. What is the effect of this adjustment?
9. I have tried to attach my Canon EOS camera to my 750mm Dobsonian telescope using a 1.25″ adapter, but cannot get a focused image on camera. Having watched a few YouTube clips I think it’s a common problem to do with what is called ‘back focus length’, and the focus on my telescope doesn’t allow the camera to get close enough. Can you help?
10. How to calculate the magnification of a telescope coupled with a DSLR camera?
11. I’m new to digiscoping. I have one of your 25-125×92 scopes which I’m very happy with. If I put a DSLR adapter on, do I need to remove eyepiece? Also, if I put say a camera with 60x zoom on the scope, does that mean it’s capable of 185x zoom, or if I put say a coolpix capable of 250x zoom does that mean 375x zoom?
12. Can I expect decent results when the Nipon 25-125×92 scope is coupled with my Canon EOS camera?
13. Can I attach a digital camera to riflescopes for digi-scoping?
14. I have got a correct DSLR camera adapter set for my NIPON 25-125×92 scope. But when I tried to attach the adapter barrel to the scope, it looks that the barrel thread size is too small than that of the eyepiece base. Could you please advise?
15. How to connect a compact digital camera other than DSLR to telescopes for digiscoping?
Please contact us by email to: support@nipon-scope.com if your question is not listed here.
1. Can I attach a digital camera to telescopes or microscopes?
There is an increasing requirement for digi-scoping – attaching digital cameras to telescopes or microscopes to take pictures of distant objects or microscopic samples. You can achieve this by hand holding the camera, for example, or by mounting the camera on a tripod next to the telescope or microscope eyepiece, by using a universal camera adapter or a DSLR camera adapter. You can also use a digital eyepiece which can take pictures and video footage through the scope and save the image to your computer.
Most NIPON telescopes have got standard 1.25″ (31.7mm) eyepiece holder (also known as “focuser”) (eg. Nipon MC800x80, 350×70, 350×80, 600×50, 450×95 scope models). For these telescopes, you can either use the digital eyepiece/camera for digi-scoping, or fit a DSLR camera adapter (with 1.25″ fitting) to connect your DSLR cameras to the scope.
Alternatively, for many compact cameras with non-detachable lens, you can use one of the “Universal camera adapters” to attach your camera to the scope.
For digi-scoping through microscopes, you can either use a digital eyepiece/camera as mentioned earlier, with a special adapter for this purpose, or use a DSLR camera. Please read Question 4 for further information on this topic.
It should be understood that digi-scoping is sometimes not as straightforward as you might expect, and the focus systems of the camera and the telescope or microscope will need to match and carefully adjusted. If you are keen on this issue, please read the questions below for more information.
2. What is the digital eyepiece for telescopes and microscopes?
A digital eyepiece is a device that can be attached to telescopes or microscopes and linked to a desktop/laptop computer through a USB cable. You can see object on the computer screen as you would see through the scope and take pictures. You can also make a video recording of the scene and save the video file into the computer. Nowadays people tend to attach their own cameras to telescopes/microscopes for digi-scoping using various types of camera adapters.
3. How to connect a DSLR (or digital SLR) camera to telescope?
Digi-scoping is becoming increasingly popular nowadays as people try to combine the function of powerful telescopes with advanced digital photographic technology. This note is prepared to point you in the general direction for digi-scoping using DSLR cameras.
There are basically two methods to connect a DSLR camera to a telescope. The first method is to attach the DSLR camera body (without the camera lens) to the scope using a DSLR camera adapter. The second method is to use a universal camera adapter.
With the first method, the scope effectively becomes a telephoto lens of your camera. Traditionally, this is achieved by using two separate components: a T-adapter tube and a camera T-ring (also known as T2 mount). The T-ring is connected to the DSLR camera in the place of the camera lens, and the camera is then connected to the scope’s eyepiece holder through the T-adapter tube.
There are different types of T-rings for different camera models, but the T-adapter is designed to fit a range of T-rings and scopes. The images below show how the DSLR camera can be connected to NIPON 800×80 scope through a T-ring and a T-adapter.
The NIPON 800×80 telescope has got a T-ring connection thread on top of its eyepiece holder:

A DSLR T-ring and camera can be directly attached to this eyepiece holder (without the telescope eyepiece in place):

Please be aware that in the above setting, because the camera lens and telescope eyepiece are removed from the system, the image you see from the camera viewfinder would be upside down. This does not affect the result in astronomical photographing, but can be inconvenient for viewing objects on land. A diagonal lens (image converting lens) can be used to convert the image right side up. However, adding a diagonal lens would make the connection more complicated.
Alternatively, you can insert a telescope eyepiece into the scope’s eyepiece holder, before attaching the camera. The image you see on the camera’s viewfinder would become right side up. In this setting, a T-adapter tube can be used to link the camera to the scope while keeping the eyepiece inside the adapter tube:

For telescopes with standard 1.25″ eyepiece holder (focuser) but there are no T-ring fitting threads on the focuser (eg. Nipon 350×70, 450×95 scopes), a 1.25″ T-adapter set (take Nikon cameras for example) can be used for camera attachment:

Most spotting scopes have got built-in zoom eyepieces which are often not supposed to be removed from the scope body for waterproof reasons, such as the NIPON 25-75×70 and 25-125×92 scopes. Therefore, a purposely made adapter set can be used to attach DSLR cameras to these scopes. A correct adapter set will need to be selected according to camera makes (eg. Canon, Nikon, Pentax K., etc.).

The second method of connecting a digital camera to scopes is to use a universal camera adapter. These adapters enable you to attach a digital camera (including both SLR and compact digital cameras) to a scope’s eyepiece. You do not need to remove the camera’s lens in this setting.
4. I wish to attach my Nikon DSLR camera to the Nipon biological microscope to take pictures of samples. Could you please advise on how to do this?
To connect your Nikon DSLR camera to this microscope, you would need a Nikon DSLR camera adapter with 1.25″ fit for scopes and this 1.25″ eyepiece adapter for microscopes.
Here are some technical advice which may be useful for you when using the microscope for the digi-scoping with your camera:
(1) Set up the microscope and put the microscope eyepiece into its eyepiece holder.
(2) Place a sample slide on the stage and fix it on the clips.
(3) Check to see if the microscope’s objective lens marked with 4x (the shortest lens of the three) is facing down as this lens will make the observation easier at the start (rotate the lens disc to select this lens if necessary). Adjust the stage position so that the sample is moved directly under the lens.
(4) Switch on the microscope light and select the switch mode so that the light underneath the stage is on.
(5) Adjust the focus knob of the microscope while looking through the eyepiece until the image is clear and adjust the slide position if necessary.
(6) If you wish to take pictures of the sample with your Nikon camera, remove the microscope eyepiece and insert the 1.25″ eyepiece adapter into the eyepiece barrel.
(7) Remove the camera lens and connect the Nikon camera adapter to the camera body. Remember to set the camera mode to “Manual” (M).
(8) Insert the 1.25″ T-adapter tube (attached to your camera) into the 1.25″ eyepiece adapter that has been placed on the microscope in step 6. (Note: Please do not let go with your camera, but hold it with at least one hand).
(9) Slowly adjust the focus knob while looking through the viewfinder of the camera and take pictures. Adjust the lighting and slide position, as well as your camera’s exposure setting if necessary for better image.
Follow-up – message from the customer who initially raised this question: “Thank you for these instructions. I have just taken few sample photos to learn the microscope setup and appropriate camera settings, and I’m pleased how they turned out. Everything seems to be in order, so thank you very much!”
5. I have got the Nipon 25-125×92 spotting scope which is very good and powerful. I also bought the T2 connecter (T-adapter set) for my Sony A380 camera. But when I connect it to my camera, it says ‘No lens attached’, ‘shutter is locked’. Why is this?
Reply: Your camera displays this message because the camera lens has been removed. You need to set your camera to “Manual” (M) mode in order to take pictures through the scope. Adjust the image focus using the focus knob of the scope.
Q: Thanks for the advice. It’s taking pictures now, but the photos have all come out black. I don’t know why. The scope is great, but my camera skills are not. Can you please advise me on what settings I need to use for taking good pictures?
Reply: The black image could be due to the exposure setting on your camera. Your camera’s exposure time may have been set too short thus very little light comes into the camera through the telescope. Some user experience suggests that the image quality is best when the exposure time is set around 1/8 seconds. Please check to see if you can adjust this value on your camera and try it. By the way, your camera and the scope must be kept very steady when taking pictures, or the photos may not be sharp because any small movement would be magnified by many times.
Q: Thank you so much, that has worked. I now will consider getting a large steady tripod in order to stop the wobble of the scope and camera.
6. I wish to connect my Panasonic Lumix DMC-G1 4/3 DSLR camera to the 25-125×92 scope. Which camera adaptor should I use?
To connect your Panasonic camera to the NIPON 25-125×92 scope, please use this “Panasonic Lumix G” adapter.
Before using this adapter for your camera connection, it is advised that you test your camera to see if you can take pictures through the scope. You can do this by following these steps:
(1) Remove the camera lens from the camera body;
(2) Aim the scope at a distant object and get the object focused on the eyepiece;
(3) Set the camera to manual mode and hold it against the scope eyepiece to see if you can view the image on camera’s viewfinder, and if so,
(4) Adjust the scope’s focus knob to make the image clearer and take a picture.
Move the camera a little distance from the scope’s eyepiece to see if you can still get a focused image on the camera. If you can get a reasonably clear picture in this way, the system should also work when the adapter is used.
Further information:
The Micro Four Thirds (4/3) system was developed jointly by Olympus and Panasonic. The Micro 4/3 lenses are designed to fit cameras that use the Micro Four Thirds mount, namely the Olympus PEN and Olympus OM-D models, together with the Panasonic LUMIX G Series compact system cameras. Some Sony/Minolta DSLR cameras may also share this lens mount feature (eg. Sony NEX), please check your product specification for details.
Here are some relevant information sources:
Micro 4/3rds Photography
A Complete List of Micro 4/3 Lenses
Olympus Micro 4/3 and Panasonic Lumix G camera adapters for telescopes
7. Why do I only see a white image when I try to take pictures of the full Moon using my Nipon digital eyepiece?
The Nipon digital eyepiece can be used to take pictures of distant objects through telescopes. You can see on the PC screen what you would see through the telescope’s eyepiece and take that picture (or video footage) through your computer. However, if you point your telescope to the Moon, you may only see a spot of bright light on your computer screen, rather than the details of the Moon surface. This is because that the brightness of the full Moon has exceeded the exposure limit of the camera’s hardware chip. You may get a similar result when trying to take pictures of the moon using some other types of digital cameras.
A solution: attach a Moon Filter to the digital eyepiece. You will get a better image of the moon. This should also help your astronomical observation and digi-scoping on stars in the night sky.
8. My EE300 has a threaded section on the ‘eyepiece’ that allows the lenses, by rotation, to be moved closer or further away from the chip. What is the effect of this adjustment?
The threaded section of the EE300 allows its lens to be slightly adjusted in relation to the chip (light sensor) according to the type of telescopes it is used, so that the image shown on your computer screen is in adequate size and shape. The factory/default setting of the lens is based on telescopes with about 800mm focal length, and most telescopes (with either shorter or longer focal length) can accommodate the image focusing need of this setting by means of the telescope’s focusing system. It is advised to keep the digital eyepiece at its default setting (i.e., the middle tube is almost at the same height level of the outer tube, and keep the central lens tube and the middle tube tightened together).
For telescopes with longer focal length than 800mm, if the image display on your PC screen is not ideal, move the lens further away from the chip, and vice versa. But do this only when it’s necessary for better image formation on the screen. Image quality can be improved through adequate adjustment to the software setting (eg. by reducing the brightness and increasing the contrast).
9. I have tried to attach my Canon EOS camera to my 750mm Dobsonian telescope using a 1.25″ adapter, but cannot get a focused image on camera. Having watched a few YouTube clips I think it’s a common problem to do with what is called ‘back focus length’, and the focus on my telescope doesn’t allow the camera to get close enough. Can you help?
What you have described is a common problem when attaching DSLR cameras to some telescopes with relatively shorter focal adjustment range on their focuser (eg. some reflectors), or telescopes with shorter focal length. In most cases, the adapter set shown below would be able to help get the image correctly focused on camera, especially for most refracting telescopes:

The image above: this is a DSLR 1.25″ T-adapter set with an add-on compact lens. The compact lens at the bottom of the adapter tube can help to serve the purpose of adjusting the image focal plane on your camera and enable the camera to get a focused image through a wide range of telescopes. This adapter can be used on refracting telescopes and scopes with longer focal length (eg. Nipon MC800x80 model). This adapter is suitable for most refracting telescopes (also called refractors) with focal length greater than 350mm. This adapter set is available for different camera makes (eg. Nikon, Canon, Sony, etc.).
These adapter parts can be ordered separately if you have already got some of these parts. For example, you can just add a 1.25″ T-adapter, combined with a compact lens with extension tube, if you have already got your camera T-ring.

You can also just order the compact lens with extension tube (also known as compact Barlow lens, as shown below) if you have got both a DSLR camera T-ring and a T-adapter:
Note: the compact lens in itself cannot be attached to the 1.25″ T-adapter without the extension tube, due to thread difference.
10. How to calculate the magnification of a telescope coupled with a DSLR camera?
As described in Scopes FAQ, a telescope’s magnification is calculated as: Focal Length of the Telescope Objective / Focal Length of Eyepiece. For example, when a 16mm eyepiece is used on the Nipon 450×95 refractor, it achieves 450/16=28.1x magnification
When a DSLR camera (without lens) is attached to a telescope, the magnification can be calculated as: Telescope focal length / Camera sensor diagonal
DSLR cameras sensor diagonal values can be found in product specifications. For example, Canon EOS 200D: 26.82mm; Nikon D3300: 28.21mm; cameras with 4/3 or Micro 4/3 lens mount (eg. Olympus 4/3, Panasonic Lumix G cameras): 21.6mm; Sony Alpha A300: 28.40mm; Pentax K200D: 28.26mm; and so on.
So when the Nipon 450×95 telescope is coupled with Canon 200D camera, for example, the magnification = 450/26.82=16.8x
You can also work out a camera’s sensor diagonal from its ‘Crop Factor’ (CF), also known as format factor, or focal length multiplier (FLM), which is the ratio of the dimensions of a digital camera’s imaging area compared to a reference format, often relative to 35mm film format with 43.3mm diagonal. So for a DSLR camera’s image sensor, its CF=43.3 / sensor diagonal. So you can estimate a DSLR camera’s sensor diagonal by: 43.3 / CF value.
Here are the manufacturer specific Crop Factors (CF):
Canon: 1.6x
Nikon: 1.5x
Olympus: 2.0x
Pentax: 1.5x
Sony: 1.5x
11. Can I expect decent results when the Nipon 25-125×92 scope is coupled with my Canon EOS camera?
Telescopes are designed to be viewed directly by their users’ own eyes, and digi-scoping is only a relatively more recent fashion as a by-product of some scopes when digital cameras and their specially made adapters became available. Image wise, hard to say as this is a subjective issue with people having different expectations, but for close targets, we would say that best results are achieved by using the camera’s own zoom lens which is designed for photo taking purpose. For targets which are located far away and even beyond the reach of a normal camera lens, their pictures can still be taken when a camera is well coupled with the scope, using the Canon EOS camera adapter set, for example. It’s not only the quality of the image, but also something you would not be able to achieve otherwise. The scope is effectively used as a camera lens in this case, for long distance shoot. Please set the telescope zoom at its lower level for better image result.
By the way, please make sure the scope is securely supported with a strong tripod and the camera is well connected and balanced over the scope. Hold/support the camera body by hands if necessary to avoid fall over. Hang a load on the tripod’s central weight hook (if available) to make the support steadier.
12. I’m new to digiscoping. I have one of your 25-125×92 scopes which I’m very happy with. If I put a DSLR adapter on, do I need to remove eyepiece? Also, if I put say a camera with 60x zoom on the scope, does that mean it’s capable of 185x zoom, or if I put say a coolpix capable of 250x zoom does that mean 375x zoom?
Thank you for your query. To use the DSLR adapter to connect your camera to the 25-125×92 scope, you do not need to remove the zoom eyepiece of the scope, but you will need to remove the camera lens and just attach the camera body to the adapter. So the zoom lens of the camera is not involved in this scenario. Please make sure you select a correct camera T-ring for your camera make/model (eg. Canon, Nikon, etc).
In theory, if you set both the scope’s eyepiece zoom and the camera’s lens zoom at their top level and put them together, you should get a combined magnification. However, as the magnification is increased, the apertures of the camera and scope are decreased, so is the overall field of view. Thus the amount of light that can reach the camera is also reduced. At higher magnification levels, the amount of light coming into the camera can be reduced to such a level that you can hardly see any light/image on the camera’s viewfinder. Therefore, as far as the digi-scoping is concerned, a better image result is achieved by just attaching the camera body to the scope without including the camera lens.
13. I wish to attach my compact digital camera to a riflescope, but I don’t want to have a large metal frame around the scope. Is there a practical way to do this?
As far as digi-scoping is concerned, most camera adapters are designed for attaching cameras to telescopes, spotting scopes, or binoculars, but a purposely made camera adapter for riflescopes is still difficult to find in the market, if it is available at all. You can use a universal camera adapter to achieve this purpose, but this does present a problem with their size and structure, which may be inconvenient for riflescopes.
For some riflescopes with around 37mm outer eyepiece diameter, there is a simple method to attach some compact digital cameras to riflescopes, using a 1.25″ T-adapter and T-ring set, combined with a particular camera adapter ring. For further details, please see the listing “Compact digital camera adapter for reflescopes with 37mm outside eyepiece diameter“.
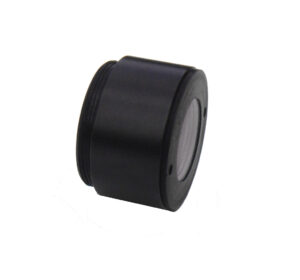
14. I have got a correct DSLR camera adapter set for my NIPON 25-125×92 scope. But when I tried to attach the adapter barrel to the scope, it looks that the barrel thread size is too small than that of the eyepiece base. Could you please advise?
The correct DSLR adapter set for the NIPON 25-125×92 scope looks like this:
This adapter barrel has the same thread dimension as at the zoom eyepiece base of the scope, thus it can be attached to the scope over the eyepiece.
What might have happened is that the scope comes with a solid eyepiece cover / cap which has a threaded metal ring mounted inside the cover. If this eyepiece cover is turned too tight, the ring may come out of the cover and stuck with the eyepiece base when the cap is unscrewed from the eyepiece (as shown in photos below). Please remove this ring from the eyepiece base before attaching the adapter barrel. Put some lubricants such as WD-40 around the ring to help get it off. Care shall be taken not to turn the eyepiece cover too tight when you put it back.


15. How to connect a compact digital camera (other than DSLR) to telescopes for digiscoping?
There are two methods to attach a compact digital camera to telescopes. One is to use a universal camera adapter such as a Type-B adapter, a S-shape adapter, or a t-shape adapter depending the size and weight of the camera.
The second method is to use one of these universal camera adapter rings. The ring comes with different thread dimensions such as 28mm, 37mm, 43mm, 49mm 52mm, 55mm and so on. One example is shown below for a 52mm adapter ring.

These adapter rings have external threads which can be connected to the camera’s lens filter. The ring can clamp on to telescope eyepieces that have standard 1.25″ external diameter. The adapter is secured on the eyepiece using the three screws. These screws are also used to adjusted the optimum camera position in relation to the telescope eyepiece. The pictures below show two types of cameras that are attached to telescope eyepiece using this type of adapter ring. You would need to choose a correct ring size based on the thread dimension of your camera’s lens filter threads. Please read more on the item description page.


Please email us with your suggestions: support@nipon-scope.com
Thank you!